Cellular/Pleated Shades Installation Guide
- - Measuring tape
- - Power drill, drill bits
- - Hex head and/or Phillips driver bit
- - Pencil
Additional fasteners other than those sent with your shade may be required depending on the mounting surface. Wallboard and plaster require the use of anchors such as expansion or toggle bolts. Brick, tile or stone need special plugs and drill bits. Remember to always pre-drill holes in wood to avoid splitting.
 Mounting Bracket |
 Metal Screw |
 Wood Screw |
 Hold Down Bracket (optional) |
 Extension Bracket (optional) |
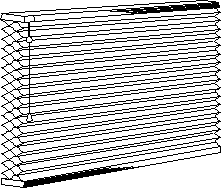
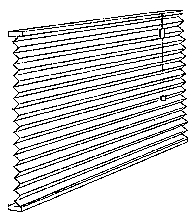
Our Honeycomb and Pleated shades are constructed to be hung as either an Inside Mount or an Outside Mount. The Installation Bracket can be mounted inside the window opening, for an inside mount, or on the molding or wall above the window for an outside mount. The Extension Bracket and the Hold Down Bracket are optional items requested at the time of ordering the shade. The Extension Bracket provides projection of the Installation Bracket in order to clear obstructions. The Hold Down Bracket keeps the shade from swaying and is often used for installation on door windows.
BRACKET INSTALLATION
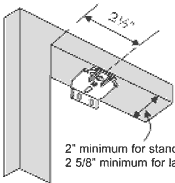
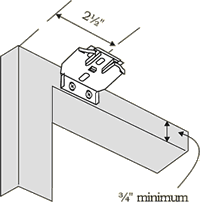
Shades are shipped with the required number of brackets for proper installation. End brackets should be located with centerlines 2½" in from each end. Depending on the width of the shade, additional brackets may be necessary evenly spaced between the two end brackets.
| For shade widths of: | Use this Number of brackets: |
| Up to 40" | 2 |
| 40" - 72" | 3 |
| 72" - 84" | 4 |
| 84" and up | 5 |
Using the Installation Bracket as a template, measure and mark the center lines. When mounting brackets, make sure they are in line and level.
On shades 84" - 96" wide it is recommended to use a second bracket located next to the end bracket at the Cord Lock.

| INSIDE MOUNT To fully recess the shade requires a flat surface with a minimum depth of 2" for standard rail or 2 5/8" for large rail. Shallow mounting requires ½" minimum. |
OUTSIDE MOUNT The brackets are mounted with two bugle screws through the back end of the bracket flat against the window molding or the wall above the window. The bracket requires a minimum surface ¾" high. |
|
 |
 |
EXTENSION BRACKETS (Optional)
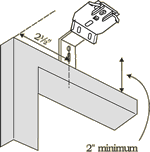
Optional Extension Brackets are used to project the back of the shade up to 2 3/8" from the mounting surface. Attach the Installation Bracket to the Extension Bracket with the nut and bolt provided.
 |
 |
HANGING THE SHADE
Unwind the cord from the shade but keep the rubber band around the shade stack.
- Hold the shade up near the brackets and insert the front clip of the bracket into the front groove of the rail.
- Make sure the shade is centered in the window opening.
- Push the rail back and up until the back clips of the bracket are inserted in the back groove of the rail.
To remove shade, reverse procedure.

HOLD DOWN BRACKET (Optional)
Optional Hold Down Brackets are mounted with the supplied screws. With the shade at its proper drop, place the pin of each Hold Down into the hole in each End Cap and mark the screw holes. Make sure the pins are level and aligned. Raise the shade, then screw the Hold Down Bracket into the mounting surface.
Cellular Shade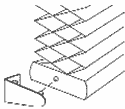 |
Pleated Shade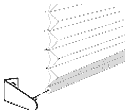 |
TWO-ON-ONE HEADRAIL SPLICER
For shades ordered as Two-on-One Headrail using the Splicer piece, insert Splicer in Headrail of both shades as shown. Lock into place using 3/8" Tek Screws provided.
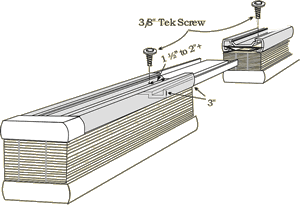 |
 Aluminum Splicer Piece |
CORDLOCK OPERATION
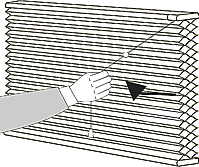 |
To raise or lock the shade, pull the cord straight down and outward toward the edge of the shade. To lower or release shade, pull the cord inward toward the center of the shade. |
PROTECT YOUR CHILDREN
Be aware that it is possible for children to strangle in window covering cords. All cords must be kept out of the reach of children, including infants. When furnishing and decorating, make sure to locate cribs and beds away from windows where dangling cords are reachable. Also, look beyond the bedrooms. Living rooms, home offices, or any room with a corded window covering should be childproofed so sofas and chairs cannot provide children with climbing access to a window. For more information, please visit www.windowcoverings.org
CLEANING AND CARE
The Shade fabric is easy to care for. Regular dusting with a feather duster or vacuum cleaner brush is recommended. Most stains can be blotted with a damp sponge and mild detergent. For problem stains, the shade can be removed from the Installation brackets and soaked in warm water. When damp, raise shade tightly to re-crisp pleats. Before using anything stronger than mild detergent and lukewarm water, test an unobtrusive corner of the shade. If you have any questions, call 1-888-650-6870.
